Seating plans
A seating plan is the layout of one of your locations for one use, such as "Centre court – tournament" or "Hall – concert". A location can have several plans.
Seating plans live under Club Admin → Club → Seating plans. The list shows each plan's location and how many seats and standing places it has. A partner club's plans are listed with the partner's name.
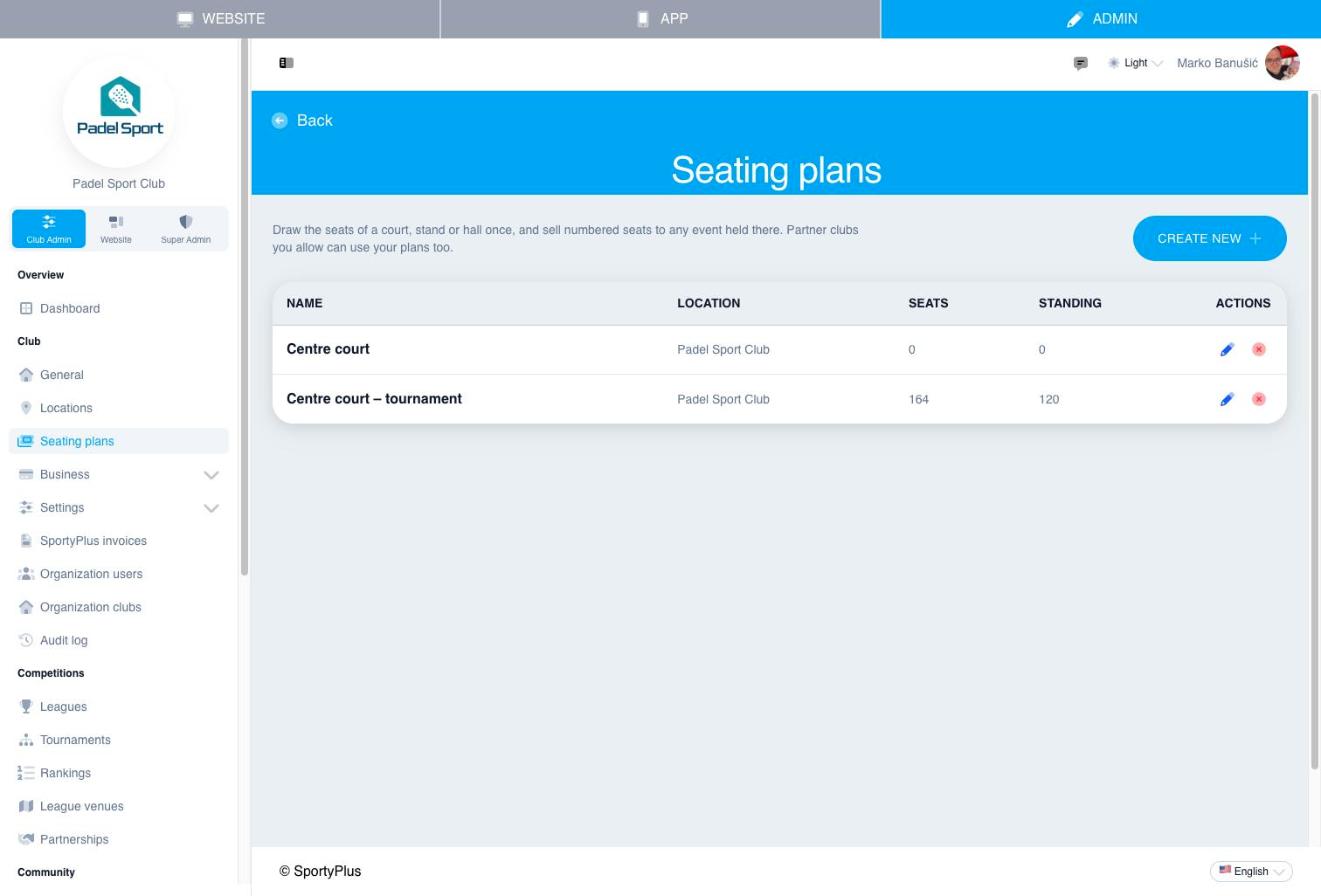
Create a plan
- Choose Create new.
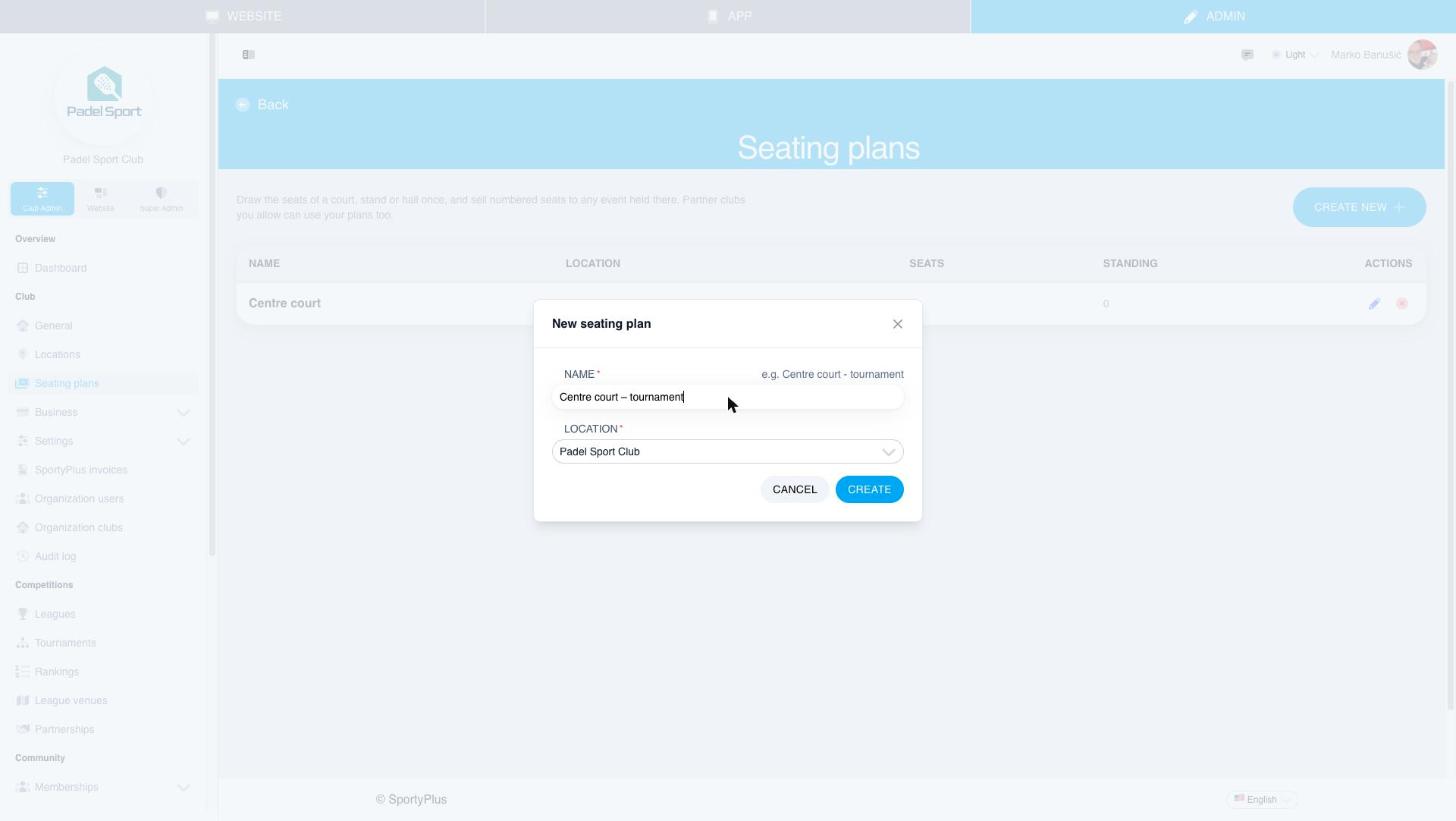
- Enter a Name, such as Centre court – tournament.
- Choose the Location the plan is for. If your club has no locations yet, the plan is put at the club's own address.
- Choose Create. The plan editor opens.
The editor
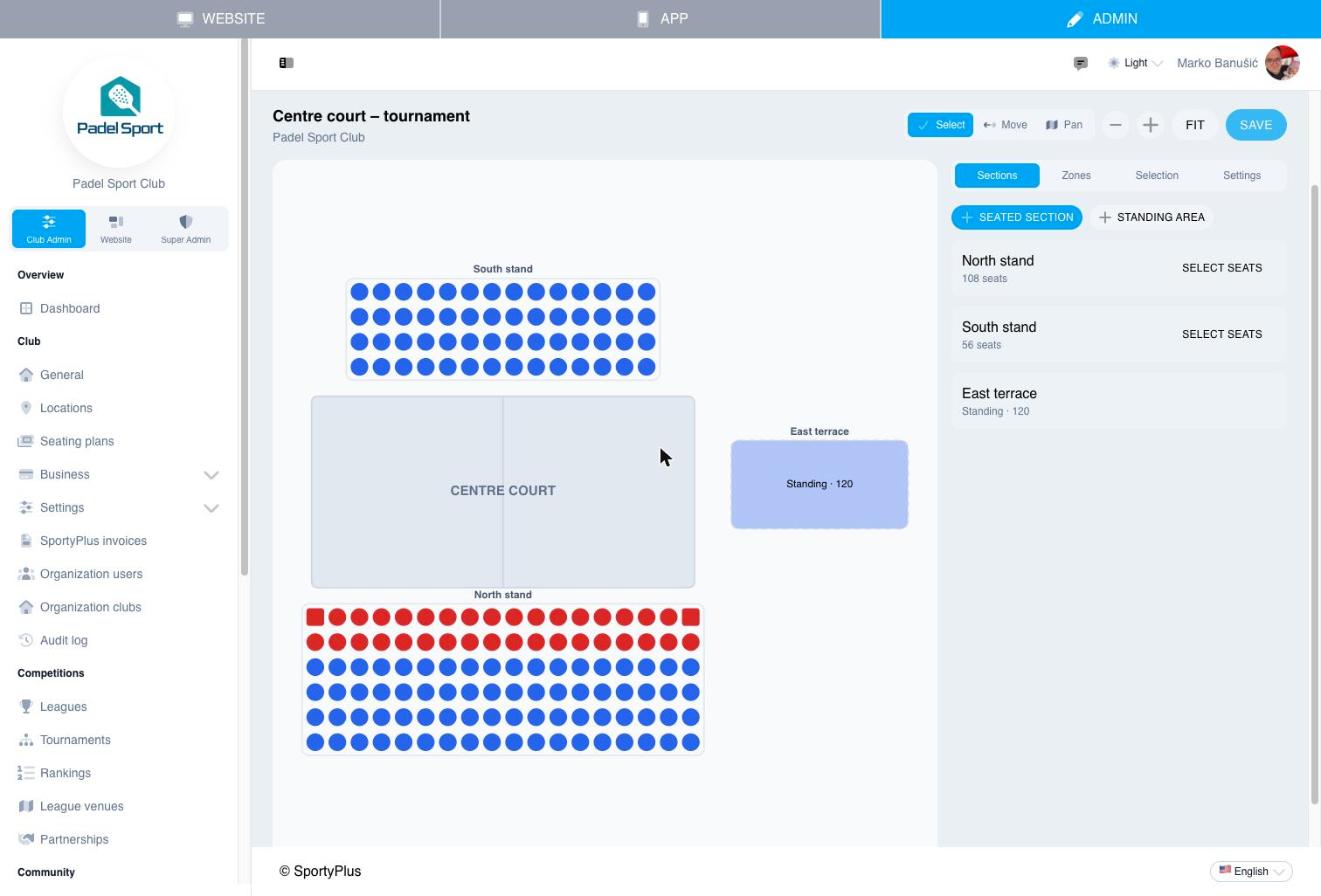
The map shows the court or stage, so buyers can tell which way they face, and every section with its seats. Seats are drawn in their zone's colour.
Above the map:
- Select picks seats. Click a seat, shift-click to add more, or drag a box around a group.
- Move drags whole sections around the map.
- Pan moves the view. You can also zoom with the mouse wheel or the − and + buttons, and Fit shows the whole plan.
- Save stores the plan. Nothing is saved until you choose it, and you're asked before leaving with unsaved changes.
The panel on the right has four tabs: Sections, Zones, Selection and Settings.
Add a seated section
A stand of many rows is one section. You don't place seats one by one: you describe the rows and the editor draws them.
- On the Sections tab, choose Seated section.
- Give the section a Name, such as North stand.
- Set Rows and Seats per row.
- Choose Add section.
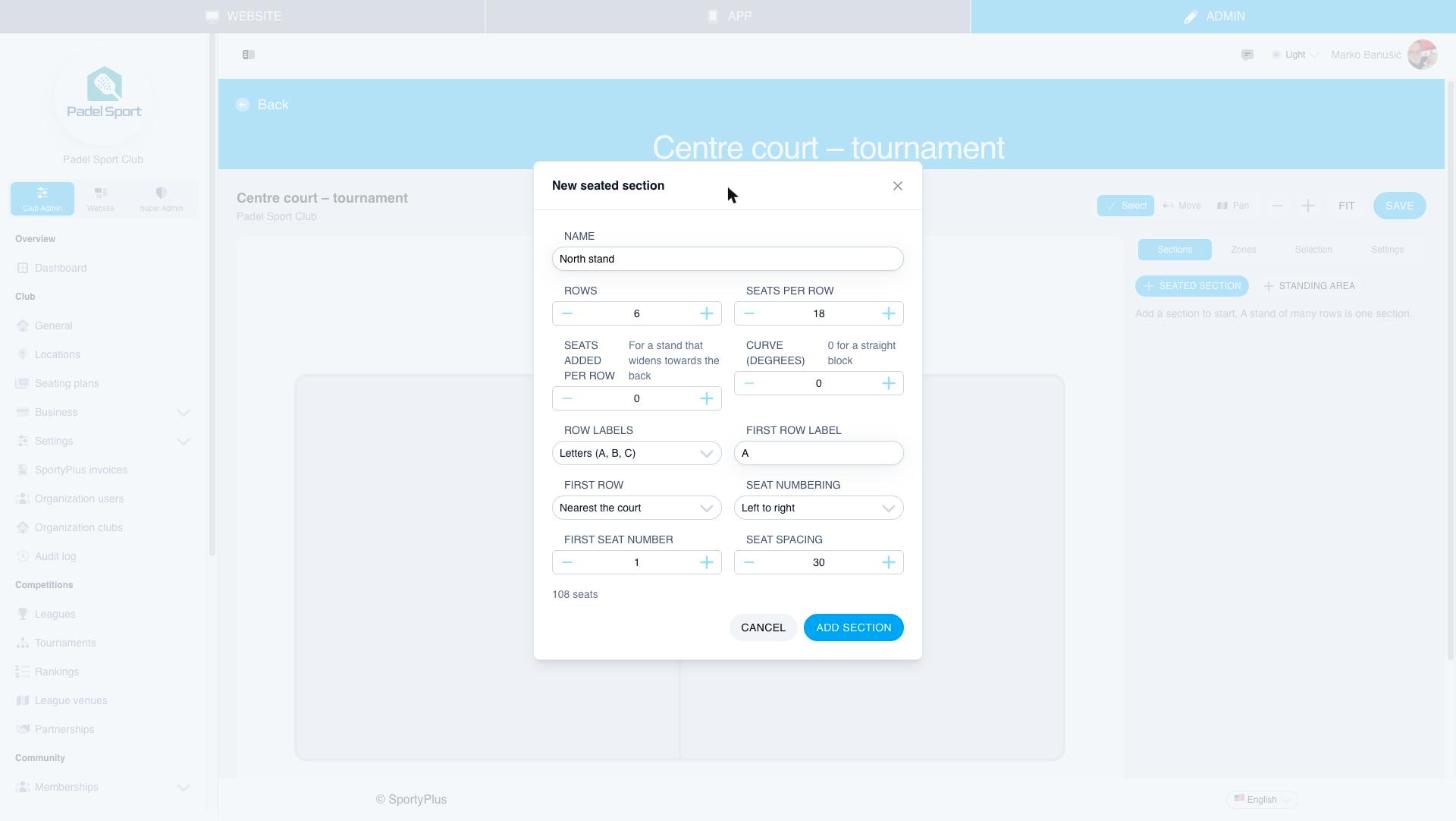
The rest of the form shapes the section:
| Field | What it does |
|---|---|
| Seats added per row | Adds seats to each row behind the first, for a stand that widens towards the back. |
| Curve (degrees) | Bends the rows around the court. 0 is a straight block. |
| Row labels | Letters (A, B, C) or numbers (1, 2, 3). |
| First row label | Where the labels start, for example A or 10. |
| First row | Whether the first row is the one nearest the court or the one furthest away. |
| Seat numbering | Left to right, right to left, or odd and even from the middle, as in most theatres. |
| First seat number | The number the first seat of each row gets. |
| Seat spacing | How far apart seats are drawn. |
The form shows how many seats the section will have.
To change a section later, select it in the Sections tab. You can rename it, turn it with Rotation or the turn buttons, change its rows with Rows and numbering, Duplicate it, or Delete it. Use the Move tool to drag it into place on the map.
Add a standing area
Choose Standing area on the Sections tab. A standing area has no seats, only a Capacity, the number of people it holds, and one Zone. Buyers choose how many standing places they want.
Zones
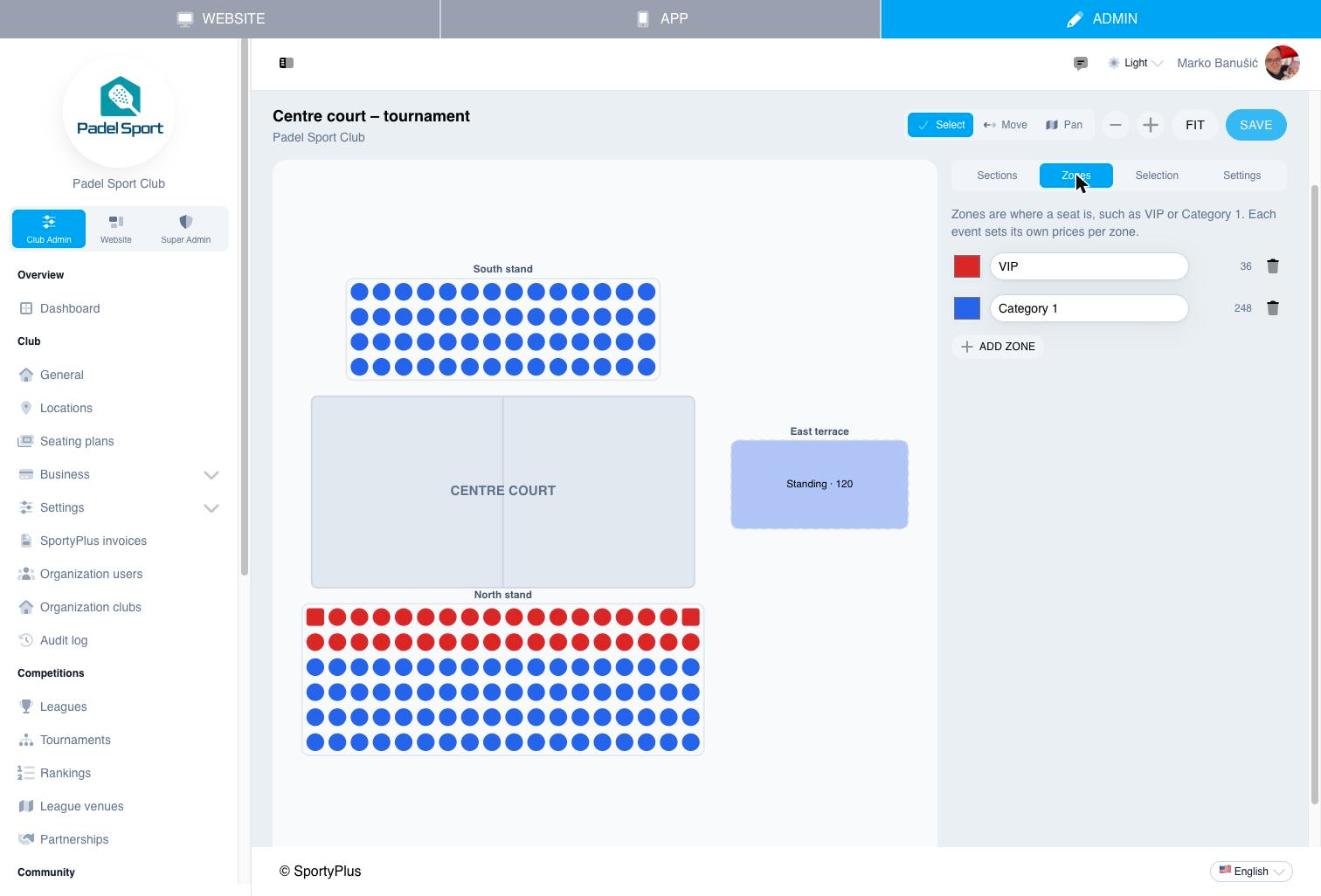
A zone is where a seat is, for pricing: VIP, Category 1, Category 2. A zone has a name and a colour but no price. Each event sets its own prices per zone.
On the Zones tab, choose Add zone, then rename it and pick its colour. The number next to each zone is how many seats and standing places it has. If some seats for sale are in no zone yet, the tab says so.
New sections start in your first zone. To put seats in another zone, select them and paint them.
Work with selected seats
Select seats on the map. Select seats in the Sections tab selects a whole section. The Selection tab then shows what you can do with them:
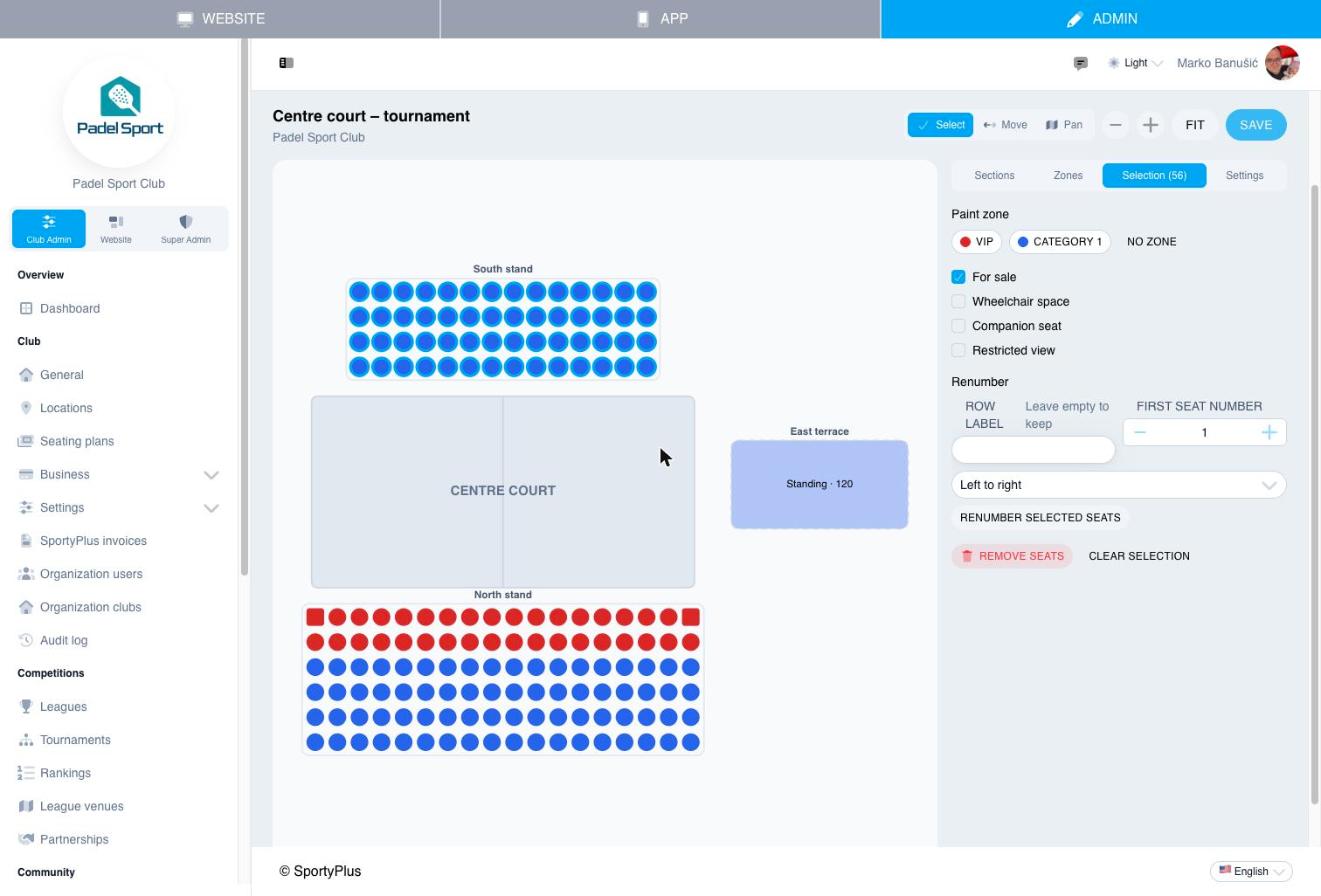
- Paint zone: put the selected seats in a zone.
- For sale: switch off for seats that are never sold, such as a camera position. They stay on the map, drawn hollow.
- Wheelchair space: drawn as a square, so buyers who need one can find it.
- Companion seat: the seat next to a wheelchair space.
- Restricted view: drawn with a dashed outline.
- Renumber: give the selected seats a new row label, or number them again, row by row, from a first number, left to right, right to left, or odd and even from the middle.
- Remove seats: delete them, for an aisle or a gap.
If two seats in a section end up with the same row and number, the editor tells you which, and you can't save until you fix it.
Settings
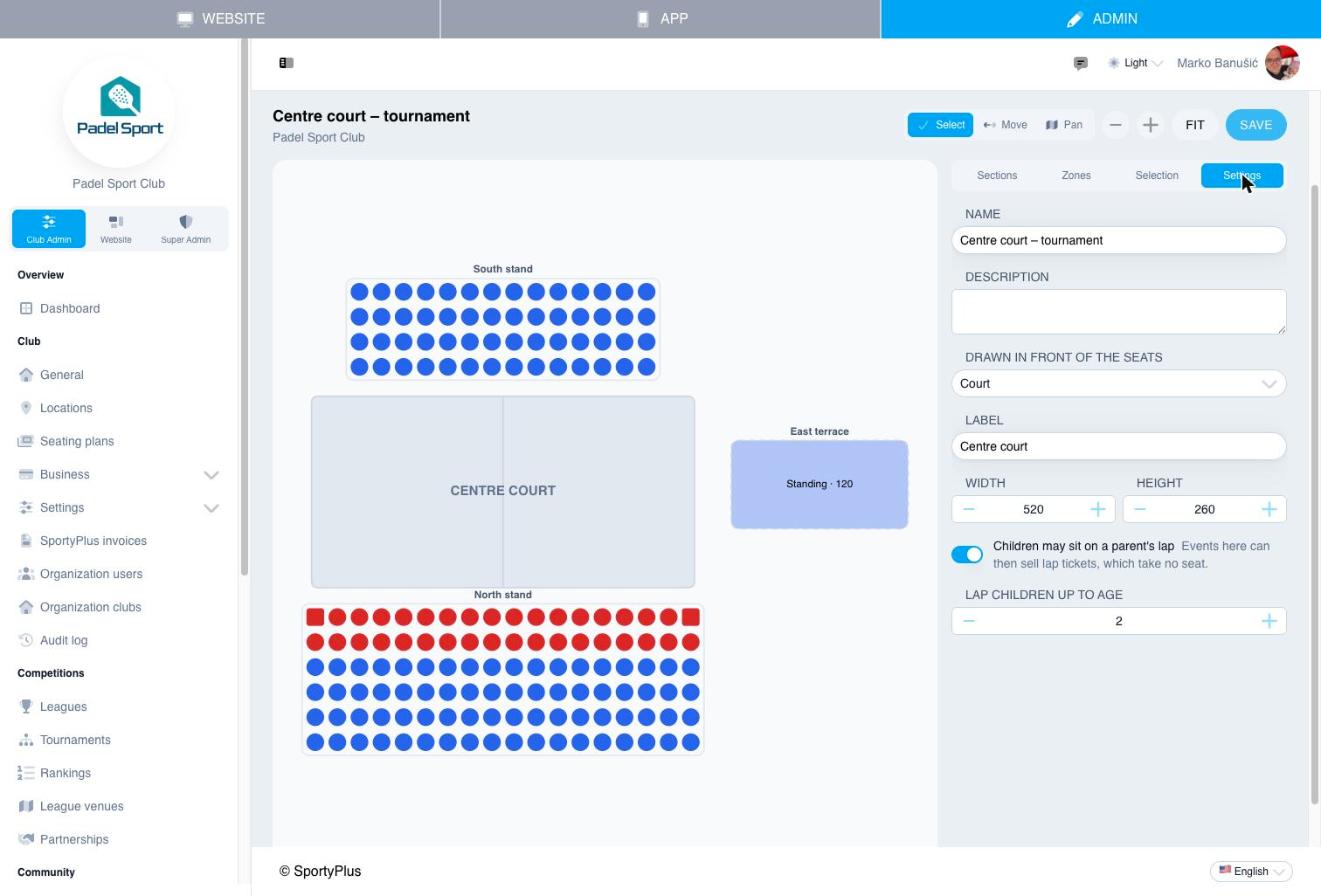
- Name and Description of the plan.
- Drawn in front of the seats: a Court, a Stage or nothing, with a Label and its size.
- Children may sit on a parent's lap: switch on where the venue allows it, and set the age limit under Lap children up to age. Events at this venue can then sell lap tickets, which take no seat. Where it is off, every child needs a seat.
Partner clubs
A club that plays at your venue can sell its own seated events from your plans. In Club Admin → Competitions → Partnerships, switch on They may sell seated events at our locations for that partner and save.
The partner then sees your plans in their list, marked with your club's name. They can use a plan for their events but can't change it. Their sales, money and buyers are theirs: you see which of their events use your plan, but not who bought tickets.
Upcoming events using a plan
When an upcoming event is seated from a plan, the plan's Settings tab lists it, and the editor reminds you that changes won't reach events already seated. To bring a change into an event, apply the plan to it again, which you can do until its first seat is sold.